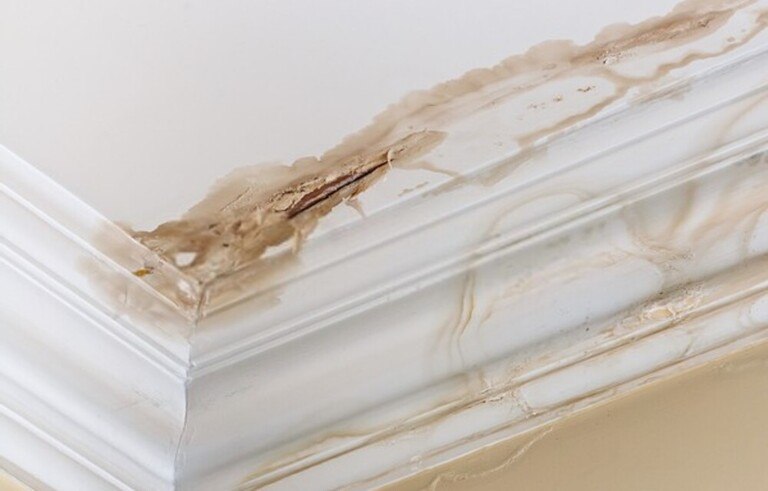
A water-damaged ceiling is one of the most common signs of a deteriorating house and this needs water-damaged quick action. The very first thing you need to do is call a water damage restoration and mold removal company.
When the mold is gone and the water is dried out, it’s time to consider whether you should ask a professional ceiling repair company for fixing the damaged area or do it on your own.
If you choose the second option, here is how to repair a water-damaged ceiling.
Causes Of A Water Damaged Ceiling

To instantly and properly repair a water damaged ceiling, it’s important to determine the cause. Based on our experience, there are four common reasons:
Weather Changes Or Temperature Changes
This is the most common cause of waterlogged ceilings.
In some states or regions, the temperature during the summer months often rises suddenly. There are months with a temperature of approximately 104 degrees F.

It is worth noting that prolonged high temperature causes the ceiling surface to crack and leak.
Defects In Brickwork
Poor accommodating expansion of brickwork is exactly the cause of a water-damaged ceiling.

It can be simply explained that concrete has more accommodating expansion than brick. Therefore, when the temperature rises all of a sudden, the difference in accommodating expansion between the two materials causes cracking in the ceiling.
The Ceiling Is Bearing Too Much Weight
Maybe the ceiling is poor-quality, resulting in less weight capacity. Or, the ceiling is actually bearing too much force, leading to cracks and leakage.
How To Repair A Water-damaged Ceiling?
To remove the ugly water stains on your ceiling and return its inherent beauty, follow this guide:
Preparation
Before embarking on the treatment of a water damaged ceiling, here are all of the needed tools you need to prepare:
- Concrete grinder
- Metal brush (or sandpaper)
- Broom
- Trowel
- White lime
- Sand (or cement)
- Water
- Two buckets and a paddle (or a mixing stick)
- Waterproofing solution
- Stepladder
- Dusk sheet and a dust mask
- PVA
Instructions
Step 1: Clean the surface of the water-damaged areas on your ceiling using a grinder, iron brush, or sandpaper.

Scrub hard to completely remove stains, moss, old paint, and long-weathered screeds.
Step 2: Use a metal brush to sweep the dust away so that when applying plaster, the surface will be smoother and more beautiful. This step also helps the plaster layer to be bonded to the ceiling surface firmly.
Step 3: Dilute the PVA in a ratio of four parts water and one part PVA. Apply it on the ceiling areas that need to be repaired

Step 4: Mix the plaster according to the manufacturer’s instructions. Before opening the bag, remember to spread the dust sheet and wear a dust mask. Pour it into a bucket and start mixing.

Step 5: Apply the 1st plaster layer on the cracks and crevices. Spread it firmly. Then, let it air dry for 15-20 minutes before smoothing the surface using a trowel.

Step 6: Apply the 2nd plaster layer, which should be thinner than the 1st one. For better results, you can use an old kitchen fork or a devilling float to scape the areas.

Again, wait 15-20 minutes for this layer to dry out completely.
Step 7: After smoothening the 2nd plaster layer, paint over those areas. All done!
What Happens If You Don’t Repair A Water-damaged Ceiling?
If you leave a water damaged ceiling untreated, here are the four things that might happen:
- The ceiling appears moldy, then the concrete structure is destroyed, which causing cracks

- Yellow stains appear on the ceiling surface

- The layers of ceiling paint peel off, which seriously affects the house’s aesthetics

- A water-damaged ceiling directly affects the health, life quality, daily activities, and safety of people who live in the house. In some cases, it leads to the risk of respiratory and dermatological diseases.
Conclusion
That’s all for this guide. Hopefully, our post helped you find out the right solution to repair a water-damaged ceiling. If you have any inquiries for us, please leave them in the comment section down below and we will respond as soon as possible. Thanks for reading!


